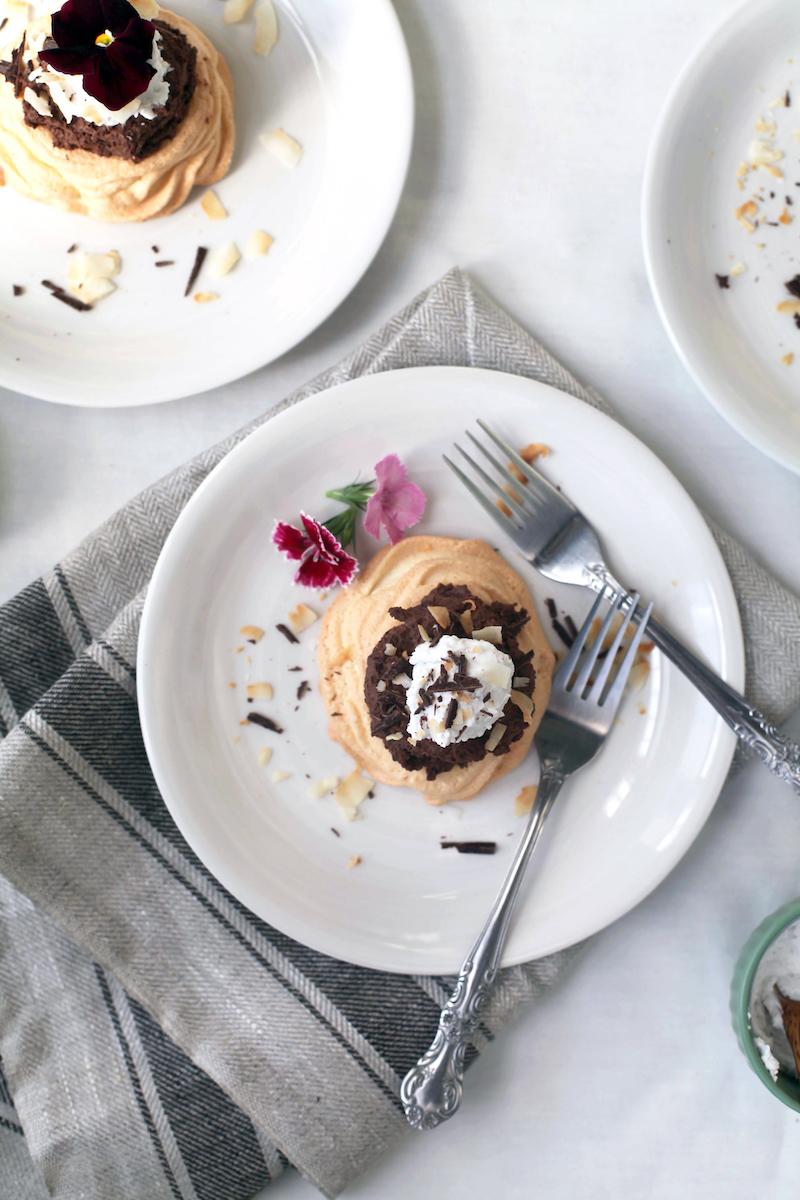
Pavlova Cups with Chocolate Coconut Mousse

Homemade gifts and meals/desserts are my favorite gifts to give. It was something that my Mom was always fond of doing and she taught us early on to do the same. Of course, at the ripe old age of 6 or 7 years old I was probably giving things that no one was excited about getting (I seem to remember once throwing together a seasoning mix that consisted of every spice in my Mom’s cabinet…whoever received that unsavory gift and had to pretend to like it, I am forever sorry!). Luckily (for the giftees), I’ve come a long way from my spice concoction days. However, homemade food is still my favorite gift to give. I believe nothing shows your love and appreciation for someone quite like presenting them with a beautiful treat or home cooked meal that you’ve put your heart and soul into.
With this in mind, it seems only fitting that my Mother’s Day gifts and treats are inspired by the OG homemade gift maker herself. These pavlova cups with coconut chocolate mousse, in particular, had me taking lots of cues from my Mom. Pavlova is her favorite dessert and, of course, she's the one who taught me everything I know about flowers, so the cups and the edible flower garnish were a no-brainer. But this dessert, that just so happens to be gluten-free and sweetened entirely with stevia (Yay for less calories!), is also inspired by one very special chocolate brand. Lily’s Sweets was introduced to me a few months back, and with both the story behind the chocolate and the incredible flavors of the product, I’ve been hooked ever since. Lily’s is sustainably made, vegan, gluten-free and non-GMO, but it doesn’t stop there. All of their products are sweetened with stevia. Translation- you get a delicious chocolate indulgence without all of the not-so-delicious calories. Truly, it’s one of the best chocolates I’ve ever had (and if you know me, you know I’ve had a lot of chocolate). They are available in tons of stores and even on-line (see where to find their products here) and they offer a variety of products, everything from baking bars to baking chips to flavored bars (I can’t get enough of the Salted Almond & Milk!), so from snacking to cooking they’ve got you covered.
Another thing that always catches my eye and makes me fall hard for a brand is when I see how dedicated they are to giving back. Lily’s is actually named for one of the co-founder’s niece, a childhood brain cancer survivor (you can read about her story here). While Lily herself is now cancer free, Lily’s Sweets gives back a portion of their profits to organizations that help children with cancer. I mean, if eating healthy chocolate that gives back to help kids with cancer isn't sweet (literally and figuratively), then I don't know what is!
Another pretty sweet thing? Making these pavlova cups for your mom when Mother's Day rolls around in a few weeks. Remember, your Mom has worked hard, and continues to work hard (Yup, I'm totally guilty of still running to my Mama for help!), to raise you, teach you, nurture you, help you and love you unconditionally, so why not give a little of that love back with a batch of these coconut mousse filled pavlova cups? After all, special people deserve special treats made with special sweets....
PAVLOVA CUPS WITH CHOCOLATE COCONUT MOUSSE AND EDIBLE FLOWERS
yields 8
INGREDIENTS
- 3 large egg whites, at room temperature
- ¼ cup stevia (if you choose to use granulated or powdered sugar, you’ll want to double this to a ½ cup)
- 1 large pinch of cornstarch
- ½ teaspoon lemon juice
- ½ teaspoon vanilla
- 2 bars of Lily’s Baking Chocolate, roughly chopped, or 1 ½ cups Lily’s Baking Chips
- 2- 13 ounce (approximately) cans of coconut cream or full fat coconut milk (MUST be full fat!), chilled in the refrigerator overnight
- Edible Flowers, for garnish
- Toasted coconut flakes, for garnish
- Extra chopped chocolate or baking chips, for garnish
INSTRUCTIONS
Preheat the oven to 250 degrees. Line a baking sheet with parchment paper. Then, use a pencil and a 3-inch biscuit cutter (or similarly sized object) to trace 8 circles onto the paper. Flip it over so that the pencil side is down. Set the sheet aside. (If you’re all about free form shapes, simply skip the tracing step and just line your baking sheet with parchment paper.)
In a stand mixer, add the egg whites to the mixing bowl. Using the whisk attachment, turn the mixer onto medium-high speed and beat until the egg whites form stiff peaks, about 2-3 minutes.
Gradually mix in the stevia, cornstarch, lemon juice and vanilla, waiting a few seconds in between each addition. Continue mixing for several minutes, until the egg whites become glossy, not grainy. This can take upwards of 5 minutes or more to achieve.
For fancy pavlova cups, add the egg white mixture to a pastry bag fitted with your choice of decorating tip. Then, begin piping along the outline of one of the circles you previously traced on the parchment paper. I recommend piping about 3-4 layers on top of each circle and then filling in the bottom.
For a more free form shape (and a much easier, simpler method), simply drop about half cup spoonfuls of egg white mixture onto the lined baking sheet, evenly spacing each mound apart. Use the back of a spoon to fluff and shape and to gently form a “cup” shape in the center.
Bake the egg whites for about 30 minutes, or until they’re slightly golden brown. Turn the oven off but keep the egg whites in to allow them to cool and harden for at least an hour (the centers may stay slightly soft, which is totally fine).
Meanwhile, in a small saucepan set over medium-low heat, melt the chocolate, stirring continuously. Once melted, remove the pan from the heat and allow the chocolate to cool.
Next, scoop just the coconut cream out of the cans and into a clean mixing bowl (set the liquid aside for other uses, like smoothies). Beat on medium speed until smooth and creamy. Reserve a half-cup of the cream for topping.
Very, very gradually and slowly, with the mixer running on low speed, add the cooled chocolate. FYI, if the chocolate is too hot it will slightly melt the cream, and if the cream is too cold it will harden the chocolate. If it melts, simply harden it back up by placing the chocolate in the fridge until chilled. Remove from refrigerator and then beat it a bit more. If the chocolate starts to harden, simply turn the speed of the mixer up. This may result in your mousse having small chocolate chunks throughout it, but I can assure you it tastes just as, if not more, delicious.
To assemble the cups, simply place a pavlova on a serving plate and fill with a generous scoop of the chocolate mousse. Top with a dollop of coconut cream, sprinkle with extra chocolate and coconut flakes and garnish with flowers.
NOTES
Do note, if your mixing bowl is not completely clean or the air is very humid, there can be a negative effect the outcome of your pavlova cups, so just be mindful of these things when making this recipe.
The pavlova cups can be made ahead and stored in an airtight container until ready to serve.
The coconut cream can be made ahead and stored in an airtight container in the refrigerator. However, I would recommend allowing it to soften and then beating it again for a few minutes before serving.
Thank you to Lily's Sweets for partnering on this post.


